

Hello my dear friends,
I have been working hard these past days making this tutorial on how to create my felted birds nest. This is a general tutorial, meaning that the outcome of each individual piece can/will be different. It depends on how much lambswool content your sweater has, how long you work with your piece, how hot the water is and how you dry your piece - all these factors have a big role in how big your nest will be and the overall look of it.

This is what you will need to make the nest:

- Old lambswool sweater (mine was 100 % lambswool)
- Three different textured types of wool
- A large, thick needle
- A strong thread and sewing needle
- Scissors
- A ruler

I chose different textures and shades of brown for my wool, so the look that you will get isn't too uniformal and more realistic looking. You are trying to achieve the look of branches, twigs and other things that you would find in a real nest.

Depending on the length of the sweater arm you use, your nest will either be larger or smaller. Whilst you felt your piece it will shrink and also during the drying it might shrink a bit more, it really is something you cannot control very much. For the nest, cut off the cuff on one of the arms. For a larger nest, cut a length of about 11 inches for the arm and for a smaller nest only use about 8 inches of the arm.

Using your strong thread - I used upholstery thread - sew a running/gathering stitch about 1/4 inch along both ends of the piece of sweater.

Then pull the thread tightly at one end, knot it off and cut the ends. ( If the arm isn't the same width on both ends use the smaller end for the inside of the nest)

Pull the thread tight and knot it off at the other end of the tube and stuff the seam allowance inside the tube (this is the bottom outside of the nest), but do not cut the thread yet.

Push the one end into the tube forming a sort of bowl shape and sew it together in the center going through both layers of the sweater, knot it off and cut thread.

This is what your nest should look like so far.

The next step is to embellish your nest. Cut a long strand of one of the wools and using your large, thick needle sew a running stitch around your nest.

When you get to the top of your nest, stitch over the edge with your wool. Now using the other types of wool do the same. You can use a much or as little as you would like, it's all up to you.

You are looking to make you nest to look natural and rustic, something close to the real thing.
And now the work really starts ...
How to felt...
You will need:
- A sink or pail
- Hot water
- Liquid dish soap
- Rubber gloves
...and good old elbow grease!
Fill your sink/pail with hot water high enough to cover your nest and put about 1 teaspoon of liquid dish soap in. (Please be careful because the water has to be hot, but not too hot that it will burn you so don't use water that has just boiled!!)

Drop your nest into the soapy water and start working it - don't forget your rubber gloves! You can almost do anything to it - kneed it, rub it against the bottom of the sink/pail or work it between your hands. You need to agitate the wool to make it turn into felt. Every so often take it out of water and check how it looks. You can also run it under the cold tap in between - this will help the felting process - and then return it back into the hot water and work it again. It takes me about 30 minutes to get the result I am looking for.

Once you like the look of your nest, take it out of the hot water and rinse it under the cold tap. Now you just have to dry it. I normally put mine on top of the heating outlet in my dinning room and let it dry over night. You could also use the tumble dryer, but that would end up costing too much just for one nest. If you would like it to stay a certain shape then you can scrunch a piece of newspaper into a ball and stuff it into the nest, if doing this you cannot use the dryer - fire hazzard!!)


Your nest is done and if you like you can add a few feathers for a more realistic look. Now the only thing for you to do is find some little eggs, a wee bird or another little critter to place in it!
And last but not least ...


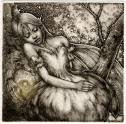
I designed this wee fellow a few days ago with the thought of another tutorial for you, but I am not too sure whether or not I like the way it turned out. What do you think?? Please drop me a line and tell me your thoughts on this little bird!
Have a peaceful and creative day,
Karen B.


Your nest and that little birdie are just adorable!!!
ReplyDeleteHugs,
Robin
Thank you for the tutorial, Karen! I love it! And you better get started on the wee little bird tutorial too! He's adorable! :) I hope you are on the mend!
ReplyDeleteBlessings,
Sonya
Oh my goodness - you are so generous! I love the nest (thanks for the felting directions - I live in a condo with no washer/dryer in my unit and did not know you could do this in your kitchen sink!!). I'm on my way to Salvation Army to find some sweaters!
ReplyDeleteThe bird is darling!
Thank you for sharing your wonderful creations!
I donot think i can make a nest like yours.
ReplyDeleteBut it is great!Lovely.
I would like to have a tutorial of that little bird...its so sweet.
Love,
Agnes
Your nests are beautiful--thank you so much for the tutorial! the directions and photos are terrific. The little bird is adorable!
ReplyDeleteOh my gosh! that little mousey is the cutest thing ever, is there any chance we can have a tutorial on him. Thank you for the tutorial! I love it!
ReplyDeleteXXXX Ido
I love your nests. They are beautiful. Thank you for the tutorial. I will be sure to give it a try. I also love those little birds. I would love to see a tutorial on those as well. I think they would be a lot of fun to make.
ReplyDeleteKaren,
ReplyDeleteI think both are ADORABLE!
Thank you for nest tutorial. Looks like a lot of work, but a fun and different look from my 'weed and natural grass' nests.
And love the little birdie. Would love to learn to make him. He would be cute with any kind of nest!
blessings
barbara jean
Karen,
ReplyDeletePosted on your sweet little nest and birdie! =)
blessings
barbara jean
tha vird is so so so cute! i hope you will make a tutoral of it, i love to make it too!
ReplyDeleteI really, really, really love that mouse, can we have a tutorial on him too. pretty please, please, please, please (or I'll keep commenting until you say yes :) LOL!)
ReplyDeleteOh yes...that little mouse is so cute too...so please...2 tutorials?Bird and mouse?
ReplyDeleteLove,
Agnes
Wow - your creations are fabulous.
ReplyDeleteI love your little bird and would so love to see a tutorial - please!
Thanks for sharing x
Please, please do the bird tutorial. It is just darling! And the nest - wonderful! Now where can I find a lambswool sweater?
ReplyDeleteTHAT IS THE SWEETEST NEST I'VE SEEN OUTSIDE OF A REAL ONE. I CAN'T WAIT TO TRY IT. THANKS FOR SHARING.
ReplyDeleteKaren, the nest is SO clever! And I love the little chubby birdie.
ReplyDeleteHugs, Diane
Thank you so very much for making this wonderful nest and showing us your techniques. Your little birdie is very tweet! I love the mouse!!! Happy Spring and Birds Who Sing...
ReplyDeleteHi Karen.. You have a lovely blog, you are are so creative.
ReplyDeleteThank you so much for sharing how you make your wonderful bird nests, and all the other great tuts you have posted. And YES PLEASE I would love for you to post a tutorial on your sweet little bird, and of course that adorable little mouse too.
Hope your back is feeling much better.
o. my. goodness Karen!!!! THIS IS GORGEOUS TO ME!!! I just love that you share your steps in making the nest too ~ and your chubby bird is adorable...I'm so glad you're blogging girl!!! hugs and love, Dawn
ReplyDeleteThank you for that excellent tutorial on making the felted nest, and I would love a tutorial for that adorable little bird, so yes please, pretty please, it would be great if you could find the time.
ReplyDeleteOh, this little and cute burdie is just soooo sweet....I love it!!! Cheers, Nadya
ReplyDeleteLove your blog ..love your nests ..love your little birdie ... please teach us how to make him...please..please.
ReplyDeleteHugz ...Betty
I am loving your blog! So glad I found it.
ReplyDeleteThat little birdie is adorable and I know I would love to know how to make one...
Blessings, Doni
Those nests are just stunning - so realistic! I especially love what you have in tthem as well. This is such a great tutorial!
ReplyDeleteI love your felted nest!!! It is too precious!
ReplyDeleteI would so love to share a picture and a link to your tutorial on my blog if that is ok-
bee blessed
mary
This is beautiful. I would like to try this project some time.
ReplyDeleteSo truly lovely and creative!! I love them both!! thnx so much for sharing!! truly delightful!! now to actually find a lambswool sweater!!!
ReplyDeleteThey both look wonderful, I love all the texture and it looks like something I could tackle. I think the bird is sweet, I love the conture to his face. Good Going.
ReplyDeleteI am a new follower, drop by for a visit.
Kathy
I LOVE LOVE LOVE IT, THE NEST!, THE MOUSE!!, THE BIRD!!! GORGEOUS!
ReplyDeleteThis is awesome ! I can't wait to make these . They will go great with my new decor . Thanks so much !
ReplyDeleteDeb
I love this! I hope you don't mind that I just pinned this tutorial to Pinterest!
ReplyDeleteThank-you for the wonderful tutorial! I will be trying this tomorrow!
ReplyDelete:)
Gaylene from Urban Stylist in the Country
Thank you so much, I would love a tutorial on the bird and mouse too.
ReplyDeleteoh I can't wait to make this.
i love the bird. love him. he has his own personality and he's perfect with the nest. he looks right at home. i would LOVE a tutorial for this little fella. the nest is amazing. i have the real deals tucked into little nooks and crannies in my home, but love the entire idea of this. i'm going to get moving on one. thanks again for your inspiration and your generosity.
ReplyDeleteLove the nest - so realistic - and the bird. Would love a tutorial on the little mouse as well. Thanks :)
ReplyDeleteWhat a great nest - and the little Canadian birdie with German wings, so sweet!
ReplyDeleteI must try the nest.
Karen, thanks for sharing.
Hi!!
ReplyDeleteEverything you do is so wonderful and you are so adverse, it is so funny alot of things I see is yours and I immediately take a liking to it, you make so many different types of things. I have your millinery head tutorial, but have not had a chance to start it as I have children and they run me ragged taking them here and there, but they will be of driving age soon and that is another worry. Anyways, I have a couple of questions. I am making one of the felted nests for my grandmother for Christmas, as she feeds the birds, squirrels and everythings else every morning, but I want to add some of the beautiful leaves you made out of the paper pages, but I don't know what the brown wire is that you wrapped them with, I have searched high and low at all my craft stores and cannot find anything that looks like it.
Also, I don't know how to crochet, but I cross stitch, sew, everything but crochet, are your tutorial for the small crocheted flowers easy enough for a beginner? The seam binding roses on top of them are fantastic. I hate to be a bother, but I think the leaves add alot to the nests, and I would like to add them to the one I am making for my grandmother, can you tell me what kind of wire it is, I know not everyone does not like to share there little secrets they use for some things and I totally respect that also.